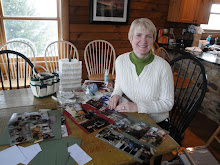
Okay, let's start the tour of my craft room! I'll do this over a few posts, since there's a lot to see...
I'll begin on the wall with the sliding glass door. From there I look out onto a patio and my backyard. I planted some flowering bushes this spring, so the view is really nice! By the door is my cutting station. It's not quite as big as I'd like, but I'm working with what I have. I put my cutter on top of an old microwave cart, and I chose this piece of discarded furniture because it's a little higher than a table, so less stress on the back. (gotta think about things like that at my age!) Plus, it's great for storage. Right now on the shelf I am keeping my new Simply Scored tool, plus some hanging folders that I am in the process of getting ready for my Designer Paper files. Underneath I've stashed a bunch of retired stamp sets that I still haven't cut out, so of course, never used! However, I can't part with them just yet.
Next to the cutting table are the "Crop In Style" filing cubes. They are 2 separate units, and I am storing all my Designer Paper in there. They hold a lot, but I still had to purge quite a bit so I could fit everything in these 2 cubes! They are high quality, very heavy, and I got them on a website called "Create for Less". Here's the drawback... Crop in Style makes these great filing cubes, yet they discontinued the hanging files that go in them! What???? So I purchased the hanging folders online (they are Cropper Hopper brand), but now I have to modify them so they actually fit in the cubes! They are a little too wide, so I have to cut down the sides and also make the metal hanger shorter. Yes, this is a real pain, which is why I'm not done yet! Then, to really complicate things, I got the cubes at 2 different times, probably a year apart, and they've changed the hanging bars inside, just enough that one cube requires the hanging folders to be about 1/4 inch smaller than the other - ugh! So now I have to modify the folders in 2 different ways. Anyway, I just wanted to warn you in case you were thinking about using this system.
Next I want to show you how I store my stamp sets. I'm using 2 bookcases that aren't very deep, maybe 12 inches. I've labeled all the sets on the side of their boxes, and they are organized by theme, such as Greetings, All Occasion, Flowers, Christmas, Halloween, Alphabets, etc. This has worked really well for me. On one shelf I have all my clear mount stamps, which definitely take up less space! But as you can see, I've already filled one shelf, so will once again need to reorganize just a bit. On the top of one shelf is where I keep my embossing powders and glitter. I have transferred them out of the tiny bottles they come in and keep them in plastic gladware type containers. I find it a lot easier to use the powders like this, with less mess. On top of the other shelf I have some displays set up.

Coming around the room, next you see how I organize my 12x12 cardstock. These are Crop In Style cubes, and they are perfect! They come separately and stack very nicely. They are also pretty heavy and sturdy. I store my card stock alphabetically by color name. To help them stay upright, I use the paper holders and dividers, which can be found in the Stampin' Up! catalog on page 226. I actually turn them sideways so I can just slide the paper in and out easily. And on top of those cubes I have a Color Caddy, where I keep retired ink pads.

So there's the start of the tour, we've made it about 1/4 of the way around the room! I think if you click on the photo, it will enlarge so you can see things up a little bit closer. If you have any questions, please feel free to leave a comment and I will answer you. Or you can email me at Sue@WeLoveToStamp.com.


No comments:
Post a Comment