Hi Everyone,
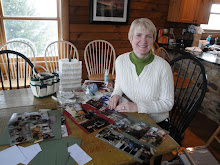
Yep, it's me! Back after a fun summer, the time just flew by! Now that I've gotten my youngest back to VA Tech, my middle one off to work everyday, and my oldest living somewhere else (he also got engaged!), it's time to get back to business. I have decided to come out of semi-retirement and have a Class! Here are the details:
We will be making 4 cards, three of them will be more advanced and worth the extra work. The 4th one will most likely be a holiday card, I haven't decided yet. We will also be doing two holiday 3-D items, just to get you started on some "gifty" things you might need!
Class will be held on Friday, October 18 at 7:30 pm, and Sunday, October 20 at 1:00 pm. Cost is $25.00. You will need to pre-register and pre-pay no later than Friday, October 11, to save a spot. You can email me at Sue@WeLoveToStamp.com , or call me at 703-689-4818.
Here is a picture of one of the cards we'll be making. You will be able to turn this into a birthday card if you'd like.
Card Class coming in October!
Two more Spring or Sale-A-Bration cards
Here are the last two cards from my February card class...
There is not much stamping on this card! The Whisper White strip of cardstock was embossed with the Delicate Designs folder. The big butterflies were punched with the Elegant Butterfly punch. The small butterflies were punched out of Sunshine and Sprinkles designer paper with the Bitty Butterfly punch, both from the Spring Mini Catalog. The ribbon is 3/8" Striped Organdy, also from the Spring Mini. The greeting is a single stamp called Beautiful Birthday.
And finally, the last card is one that I CASE'd from my upline's meeting. Unfortunately I don't know who the original artist is. The background is embossed with the Honeycomb folder from the Spring Mini. The stamp set is called "Just Thinking", also from the Mini. I punched the layered flower with the Boho Blossoms punch, and the ribbon is 3/8" Stitched Satin in Raspberry Ripple.
posted Sunday, March 10, 2013 0 comments
A Few Cards
Wow, I can't believe that I totally missed the month of February! I know it's a short month, but that's ridiculous! I have been keeping very busy, and in the next week or two I will share with you some of the projects I've been doing in my semi-retirement!
In the meantime, let me show you the cards that we did in my Card Class last month. Each card highlighted items from the Spring Mini Catalog, or a Sale-A-Bration item. Today I'll show you two cards, and over the next few days you'll get to see all six that we did.
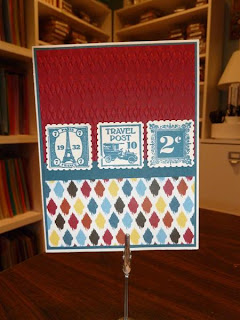
This first card uses Parker's Patterns designer paper from the Mini Catalog. I never have enough masculine cards, so this fit the bill. Inside I used a Happy Father's Day greeting. The Cherry Cobbler piece at the top of the card was embossed using the Argyle folder, and the stamp set is "Postage Due". I punched the images out with the Postage Stamp punch.
"Winter Memories" Card
Surprise - it's a Bookmark!
I CASE'd today's card from my dear friend, Deb's, blog. Thanks Deb! This is an adorable card that comes with a little gift, a bookmark!
The base is done with Daffodil Delight, and the next layer is Island Indigo. To make the bookmark, you fold a strip of Daffodil Delight card stock in half and put it on the Two Tags die, making sure the fold is just below the cut on the die. If you lay it over the cut, guess what - it will cut it! Then I put 2 pieces of magnet sheet inside and that will hold the bookmark on your page.


.JPG)
.JPG)

.JPG)
.JPG)
.JPG)


